Monday 29 May 2017

H and E Staining Procedure (Hematoxylin and Eosin staining)


Histopathology में H and E  Staining  बहुत ही Basic Staining Technique है। इसमें दो Dye Hematoxylin and Eosin के Mixture का प्रयोग किया जाता है जिससे Cytoplasmic inclusions और Nucleus को Demonstrate करना अासान  हो जाता है।

Preparation of Slide –

Histopathology लैब में Slide तैयार करने के लिए Tissue Processing की जाती है जिसमें Tissue के Infected भाग को काटकर अलग कर लेते है अब उस Tissue का Dehydration, Clearing, Impregnation, Embedding और Microtome की सहायता से Cutting किया जाता है और तैयार Smear को Slide के बीचों-बीच में ले लिया जाता है इस प्रकार स्लाईड तैयार कर ली जाती है।
Tissue Smear

Requirement of H and E Staining –

  1. Harri’s Hematoxylin
  2. Eosin
  3. 1%  HCl
  4. Distilled Ammonia Water
  5. Alcohol (100%, 90%, 80%, 70%)
  6. Xylene
  7. DPX (for mounting)
  8. Cover Slip
  9. Slide Stain tub


Preparation of Reagents –

  1. Harri’s Hematoxylin Stain –
  • A = 1 gm Hematoxyline  in 10 ml Ethenol
  • B = 20 gm Ammonium Alum in Hot Distilled Water
  • Mix A and B, Boil and add 0.5 gm of Mercuric Oxide and Filter.

 2. Eosin Solution –

  • Yelow Eosin = 1 gm
  • Distilled Water = 80 ml
  • Ethenol = 320 ml
  • Glacial acetic Acid = 2 drops


Procedure of H and E Staining –

  1. For Deparaffinize The Section - सबसे पहले स्लाईड को 10 मिनट के लिए 50-60 डिग्री सेल्सियस पर Hot Plate  पर रखते है और फिर उसे Xylene  में कुछ Seconds  के लिए Dip  करते है जिससे Tissue Smear  में मौजूद wax remove हो जाता है ।
    Hot Plate or Slide Warmer
  2. For Hydration – अब स्लाईड को Alcohol  के घटते हुए Concentration  में 100%, 90%, 80%, 70% में  और  Last  में Distilled Water / Tap water  में  Dip  कर लेते है।
  3. अब स्लाईड को  Hematoxylin  में 5-10 मिनट के लिए Dip करते है।
  4. अब स्लाईड को 5 मिनट के लिए Water  में  Dip करके Hematoxylin को  Wash   कर लेते है।
  5. अब स्लाईड को 5-10 second   के लिए 1% Acid Alcohol (1% HCL in 70% Alcohol)  में  Dip  करते है और दोबारा स्लाईड को 5 मिनट के लिए Water  में Dip  कर लेते है।
  6. अब स्लाईड को 5 मिनट के लिए  Ammonia Water में Dip करते है और इसे दोबारा  Water से Wash  कर लेते है।
  7. अब स्लाईड को 10 मिनट के लिए 1% Eosin Yellow  में  Dip करते है और स्लाईड को 5 मिनट के लिए Water  में Dip  कर लेते है।
    Eosin 
  8. For Dehydration - स्लाईड को Alcohol  के बढ़ते हुए Concentration  में 70%, 80%, 90%, 100% Alcohol में Dip करते है।
  9. For Clearing -  स्लाईड को Xylene  में Dip  करते है।
  10. अब  Tissue  को Mounting Media (DPX ) और Cover Slip  की सहायता से  Mount  कर लेते है।
  11.  इस प्रकार  Tissue Microscopic Observation  के लिए तैयार कर लिया जाता है।


Result’s Interpretation – 
 
H and E Stained Tissue Smear

  • Nuclei = Blue / Black
  • Cytoplasm = Pink
  • Muscle Fibers = Deep Red
  • RBCs = Orange Red
  • Fibrin = Deep Pink


!!Thank you !!


To watch this video click on the image.


Saturday 20 May 2017

VDRL/RPR Test

Venereal Disease Research Laboratory (VDRL) / Rapid Plasma Reagin (RPR) non-treponemal microflocculation Test  है जिसका प्रयोग Syphilis नामक  Disease  की जाँच के लिए करते है जो Treponema pallidum नाम के  spirochete  के द्वारा फैलता है जो कि एक सर्पिलाकार (Spiral in Shape) जीवाणु है।  

Methods –
  1. Slide Qualitative Test
  2. Test Tube Quantitative Test


Requirements –
  • Slide
  • Test Tube
  • VDRL Test Kit
  • Normal Saline or buffer
  • Slide Rotator 


Principle –

VDRL Reagent  में मौजूद Cardiolipin Lecithin Cholesterol Antigen, Specimen  में उपस्थित Reagin  के साथ Reaction करता है जिसके फलस्वरुप   Reagent  में उपस्थित carbon particles  का co-agglutination  Reaction और  Flocculation होता है जिसे microscope  की सहायता से Observe किया  जाता है।


1) Procedure of Slide Qualitative Test –
  • सबसे पहले VDRL antigen Suspension, controls  और  Specimen  को Room Temperature पर रखते हैं।
  • अब Cotton  की सहायता से स्लाईड को साफ कर लेते है।
  • अब पहले Circle  में  Serum,  दूसरे Circle   में  Positive Control  तीसरे Circle   में Negative Control  की एक एक बूँद डालते है।
  • अब तीनों  Circle  में  VDRL Antigen  की एक एक बूँद डालते है और अच्छे से मिलाते है।
  • अब slide को manually या mechanical rotor की सहायता से 180 r.p.m. पर Rotate करते है।
  • अब लगभग 8 मिनट बाद macroscopically, flocculation को Observe करते है।


Result –
  • Reactive: Indicated by large or small aggregates in the center or the periphery of the test circle.
  • Non-reactive: Indicated by a smooth, even light gray appearance with no aggregates visible.


2) Procedure of Test Tube Quantitative Test –
  • सबसे पहले 10 छोटे साफ व सूखे टेस्ट ट्यूब लेते है।
  • अब Pipette की सहायता से इन सभी Tubes में 500µनार्मल सलाईन ले लेते हैं।
  • अब Pipette की सहायता से पहले Test Tube में 500µl  सीरम लेते है और अच्छे से मिलाते है इस प्रकार पहले Test Tube में 1:2 Mixture तैयार हो जाता है।
  • अब Pipette की सहायता से पहले Test Tube में से 500µl Mixture निकाल कर दूसरे Test Tube में लेते है और अच्छे से मिलाते है, यह प्रक्रिया दसवें Test Tube तक चलती है और अन्त में बचे 500µl Mixture को फेंक देते है।
  • अब सभी Test Tubes में से 50 µl या 1 Drop Mixture Solution Slide के अलग अलग  Circles  में  लेते हैं और उसमें अच्छी तरह से VDRL Antigen मिलाते है ।
  • अब slide को manually या mechanical rotor की सहायता से 180 r.p.m. पर Rotate करते है।
  • अब लगभग 8 मिनट बाद macroscopicallyflocculation को Observe करते है।


Result –
       
Test Tube -           1    2      3     4      5      6       7       8        9     10

  Eq.Tube Titer - 1:2,    1:4,    1:8,   1:16,  1:32 ,  1:64,  1:128,  1:256,  1:512,  1:1024

  1. यदि Test Tubes 1 में Agglutination Reaction है तो reading 1:2 होगी।
  2. यदि Test Tubes 2 में Agglutination Reaction है तो reading 1:4  होगी।
  3. यदि Test Tubes 3 में Agglutination Reaction है तो reading 1:8  होगी।
  4. यदि Test Tubes 4 में Agglutination Reaction है तो reading 1:16  होगी।
  5. यदि Test Tubes 5 में Agglutination Reaction है तो reading 1:32  होगी।
  6. यदि Test Tubes 6 में Agglutination Reaction है तो reading 1:64  होगी।
  7. यदि Test Tubes 7 में Agglutination Reaction है तो reading 1:128  होगी।
  8. यदि Test Tubes 8 में Agglutination Reaction है तो reading 1:256  होगी।
  9. यदि Test Tubes 9 में Agglutination Reaction है तो reading 1:512  होगी।
  10. यदि Test Tubes 10 में Agglutination Reaction है तो reading 1:1024  होगी।


!!Thank You!! 

Thursday 11 May 2017

Prothrombin Time Test by Quick's Method


Introduction -
Prothrombin Time Test का प्रयोग blood plasma के clotting time को मापने के लिए करते है। Prothrombin एक plasma protein है जिसे Factor II के नाम से भी जाना जाता है जोकि एक clotting factor है और Blood के clot होने में सहायक है।

Purpose
जब आपको कोई चोट लग जाती है और blood vessels टूट जाती है  तब blood platelets, bleeding रोकने के लिए  एक जगह पर एकत्र होकर एक Temporary plug बना लेते है  और 12 coagulation factor की एक series platelets के साथ मिलकर एक substance बना लेती है जिसे Fibrin कहते है जो चोट या घाव को भर देती है।
Bleeding disorders जैसे hemophilia, Vitamin k Deficiency या Medication की वजह से हो रहे Bleeding  की जाँच के लिए Prothrombin Time Test की जाँच After and Before Surgery करायी जाती है।

Method –
  • Quick’s Method

Requirement –
  1. Water Bath
  2. Stop Watch
  3. Test Tube
  4. Brain Thromboplastin or Commercially available Thrombokinase Tablets

Specimen –
  • Citrated Plasma

Procedure -
  1. सबसे पहले एक P.T. Tablet एक Clean and Dry Test Tube में लेते है।
  2. अब उसमें Manufacturer's Direction के According Distilled Water Mix करते है।
  3. P.T. Tablet घुल जाने के बाद  Mixed Solution की 0.2 ml मात्रा को 2 अलग अलग Test Tube में लेकर इसे 37*C पर Water Bath में रखते है।
  4. अब पहले Test Tube में 0.1 ml Patient's Citrated Plasma Add करते है और Stop Watch को Start कर देते है।
  5. कुछ Seconds बाद Test Tube को तिरछा करके Coagulation Check करते है और जब Plasma liquid form से Solid में बदल जाए अर्थात जब Plasma Clot हो जाती है तब Stop Watch को Stop करके Time को Note कर लेते है।
  6. अब दूसरे Test Tube में 0.1 ml  Normal Serum Add करते है और Stop Watch को Start कर देते है।
  7. कुछ Seconds बाद Test Tube को तिरछा करके Coagulation Check करते है और जब  Plasma Clot हो जाती है तब Stop Watch को Stop करके Time को Note कर लेते है।  


Calculation -

International Normalized Ratio (I.N.R.)
                         
          Patient’s P.T./Mean Normal P.T. × ISI (International Sensitivity Index)
  • I.S.I.      =       usually 0.94 and 1.4 for more sensitive
        • 2.0-3.0 for less sensitive
Normal Values -
  • P.T.       =     12-16 seconds
  • I.N.R.     =      In absence of anti coagulation therapy is 0.8-1.2
        •  In anticoagulant use (e.g. warfarin) is 2 to 3

Thursday 4 May 2017

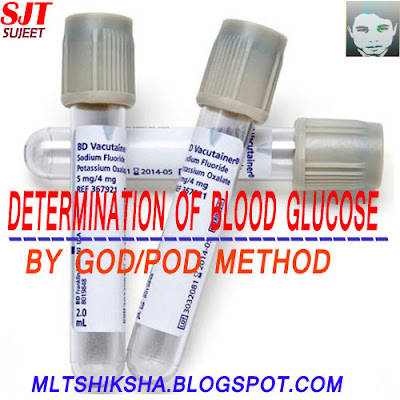
Determination of Blood Glucose by GOD/POD Method


Method –

Glucose Oxidase / Peroxidase

Principle –

जब Human Serum या Plasma में उपस्थित Aldehide group के glucose का glucose oxidase नाम के enzyme द्वारा water और Oxygen की उपस्थिती में आक्सीकरण होता है तब Gluconic Acid और hydrogen Peroxide बनता है-

Glucose + H2O + ½ O2 – Gluconic Acid + H2O2

अब यही “Hydrogen Peroxide”, “4 Aminophenazone” और “Phenol” के साथ मिलकर “Peroxidase” नामक Enzyme की सहायता द्वारा Pink colour का compound, “Quinoneimine” और “Water” बनाता है -

2 H2O2 + 4 Aminophenazone + Phenol – Quinoneimine + 4 H2O

अब इस Pink colour के compound को Spectrophotometer या colorimeter के द्वारा Read कर ली जाती है।

Requirement -
  • Glucose Reagent
  • Serological Micropipette And Tip
  • Test Tube or Cuvette
  • Test Tube or Cuvette Stand
  • Incubator
  • Spectrophotometer or Colorimeter or Semi Autoanalyzer


Spectrophotometer 
Sample –

Fluoride Plasma या Serum.

Reagent

  •  Buffer Enzyme (By mixing Glucoseoxidase 650units, Peroxidase 500units, 4-aminophenazone 20mg, Sodium Azide 30mg into 100ml of Phosphate buffer)
  •  Phenol Reagent
  •  Glucose standerd 

Preparation Of Glucose Reagent –

1 part Phenol में 2 part Buffer/Enzymes Reagent Mix करने पर Glucose Reagent तैयार हो जाता है। इसे 2-8 Degree centigrade पर Amber colored Bottle में store करके रखते है।


Procedure –
  • सबसे पहले Glucose Reagent को room Temp. पर कर लें।
  • अब Labeled Test Tube या Cuvette में निम्नवत Pipetting करते है-

                                    Blank               Standard          Test 
Glucose Reagent        1ml                    1ml                1ml
Distilled Water            10µl                    -                      -
Glucose Standard         -                        10µl                 -
 Plasma/Serum              -                         -                   10µl

  • अब सभी Test Tube या Cuvette को अच्छी तरह मिलाते है और 10 मिनट room temp. पर या 5 मिनट incubator में 37 Degree centigrade पर Incubate करते हैं।
  • अब मशीन पर 500nm-550nm Wave Length Set करते है और सबसे पहले Blank की Absorbance को मापते है ।
  • इसके बाद Blank के Against Standard की Absorbance को मापते है।
  • अब Standard के Against Test की Absorbance को मापते है और रीडिंग को नोट कर लेते है।


Calculation –

Plasma or Serum Glucose mg/dl 
                               
                             = O.D. of Test /O.D. of Standard ×100 mg/dl

OR

Plasma or Serum Glucose mg/dl 
                           
                     = O.D. of Test /O.D. of Standard × 5.55 mmol/L


Normal Values :-

  • Fasting Blood Sugar – 70-110 mg/dl
  • Post Prandial (P.P.) Blood Sugar – up to 140 mg/dl
  • Random Blood Sugar – up to 150 mg/dl 


! Thank you !


A Special Thanks to Vineet Dixit for Recommended this Post and Helping Me to Write This Post.